Step 1 :
Setup the Development Environment for Hibernate
1. Eclipse IDE
- using eclipse IDE create a Java Application project.
2. Hibernate distribution bundle
- download following .jar files and create folder called 'lib'
under project and copy and paste those .jar s to that folder
antlr-2.7.6.jar / commons-collections-3.1.jar / dom4j-1.6.1.jar
javassist-3.9.0.GA.jar / jta-1.1.jar / slf4j-api-1.5.8.jar
hibernate-jpa-2.0-api-1.0.0.Final.jar / slf4j-log4j12-1.5.8.jar
log4j-1.2.16.jar
3. Install MySQL Server and download mysql-connector-java-5.1.15-bin.jar
(JDBC driver) and copy and paste to lib folder
4. Configure Build-Path of the Project
go through build-path and add lib folder .jar files to
build path of the project
Step 2 :
Create MySQL Database tables
create two table called 'users' and 'tasks' in your MySQL Database as following,

Step 3 :
Create POJO (plain old java object) Classes
Under 'src' folder create package called 'com.test' and add following two classes.
1. User.java

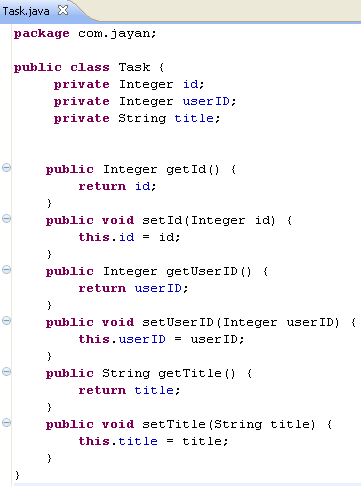
2. Task.java
Step 4 :
Create Mapping Files
Under project 'src' folder, add following .xml mapping files
1. user.xml

2. task.xml

Step 5 :
Hibernate Configuration
Under project 'src' folder, add following .xml hibernate configuration file
# hibernate.xml

Step 6 :
Create Start-up Helper Class
Under com.jayan package create start-up helper class as following,
# Hibernate.java

Step 7 :
Create Test Class
Under com.jayan package create Test class as Main class as following,
# Test.java

Step 8 :
- Finally run the Test.java class and get the Output as following,

No comments:
Post a Comment